Running Optimization
After setting up the experiment configurations, you should be able to see the initial samples in the performance space from the main window. Here we are taking a predefined test problem ZDT1 as an example.

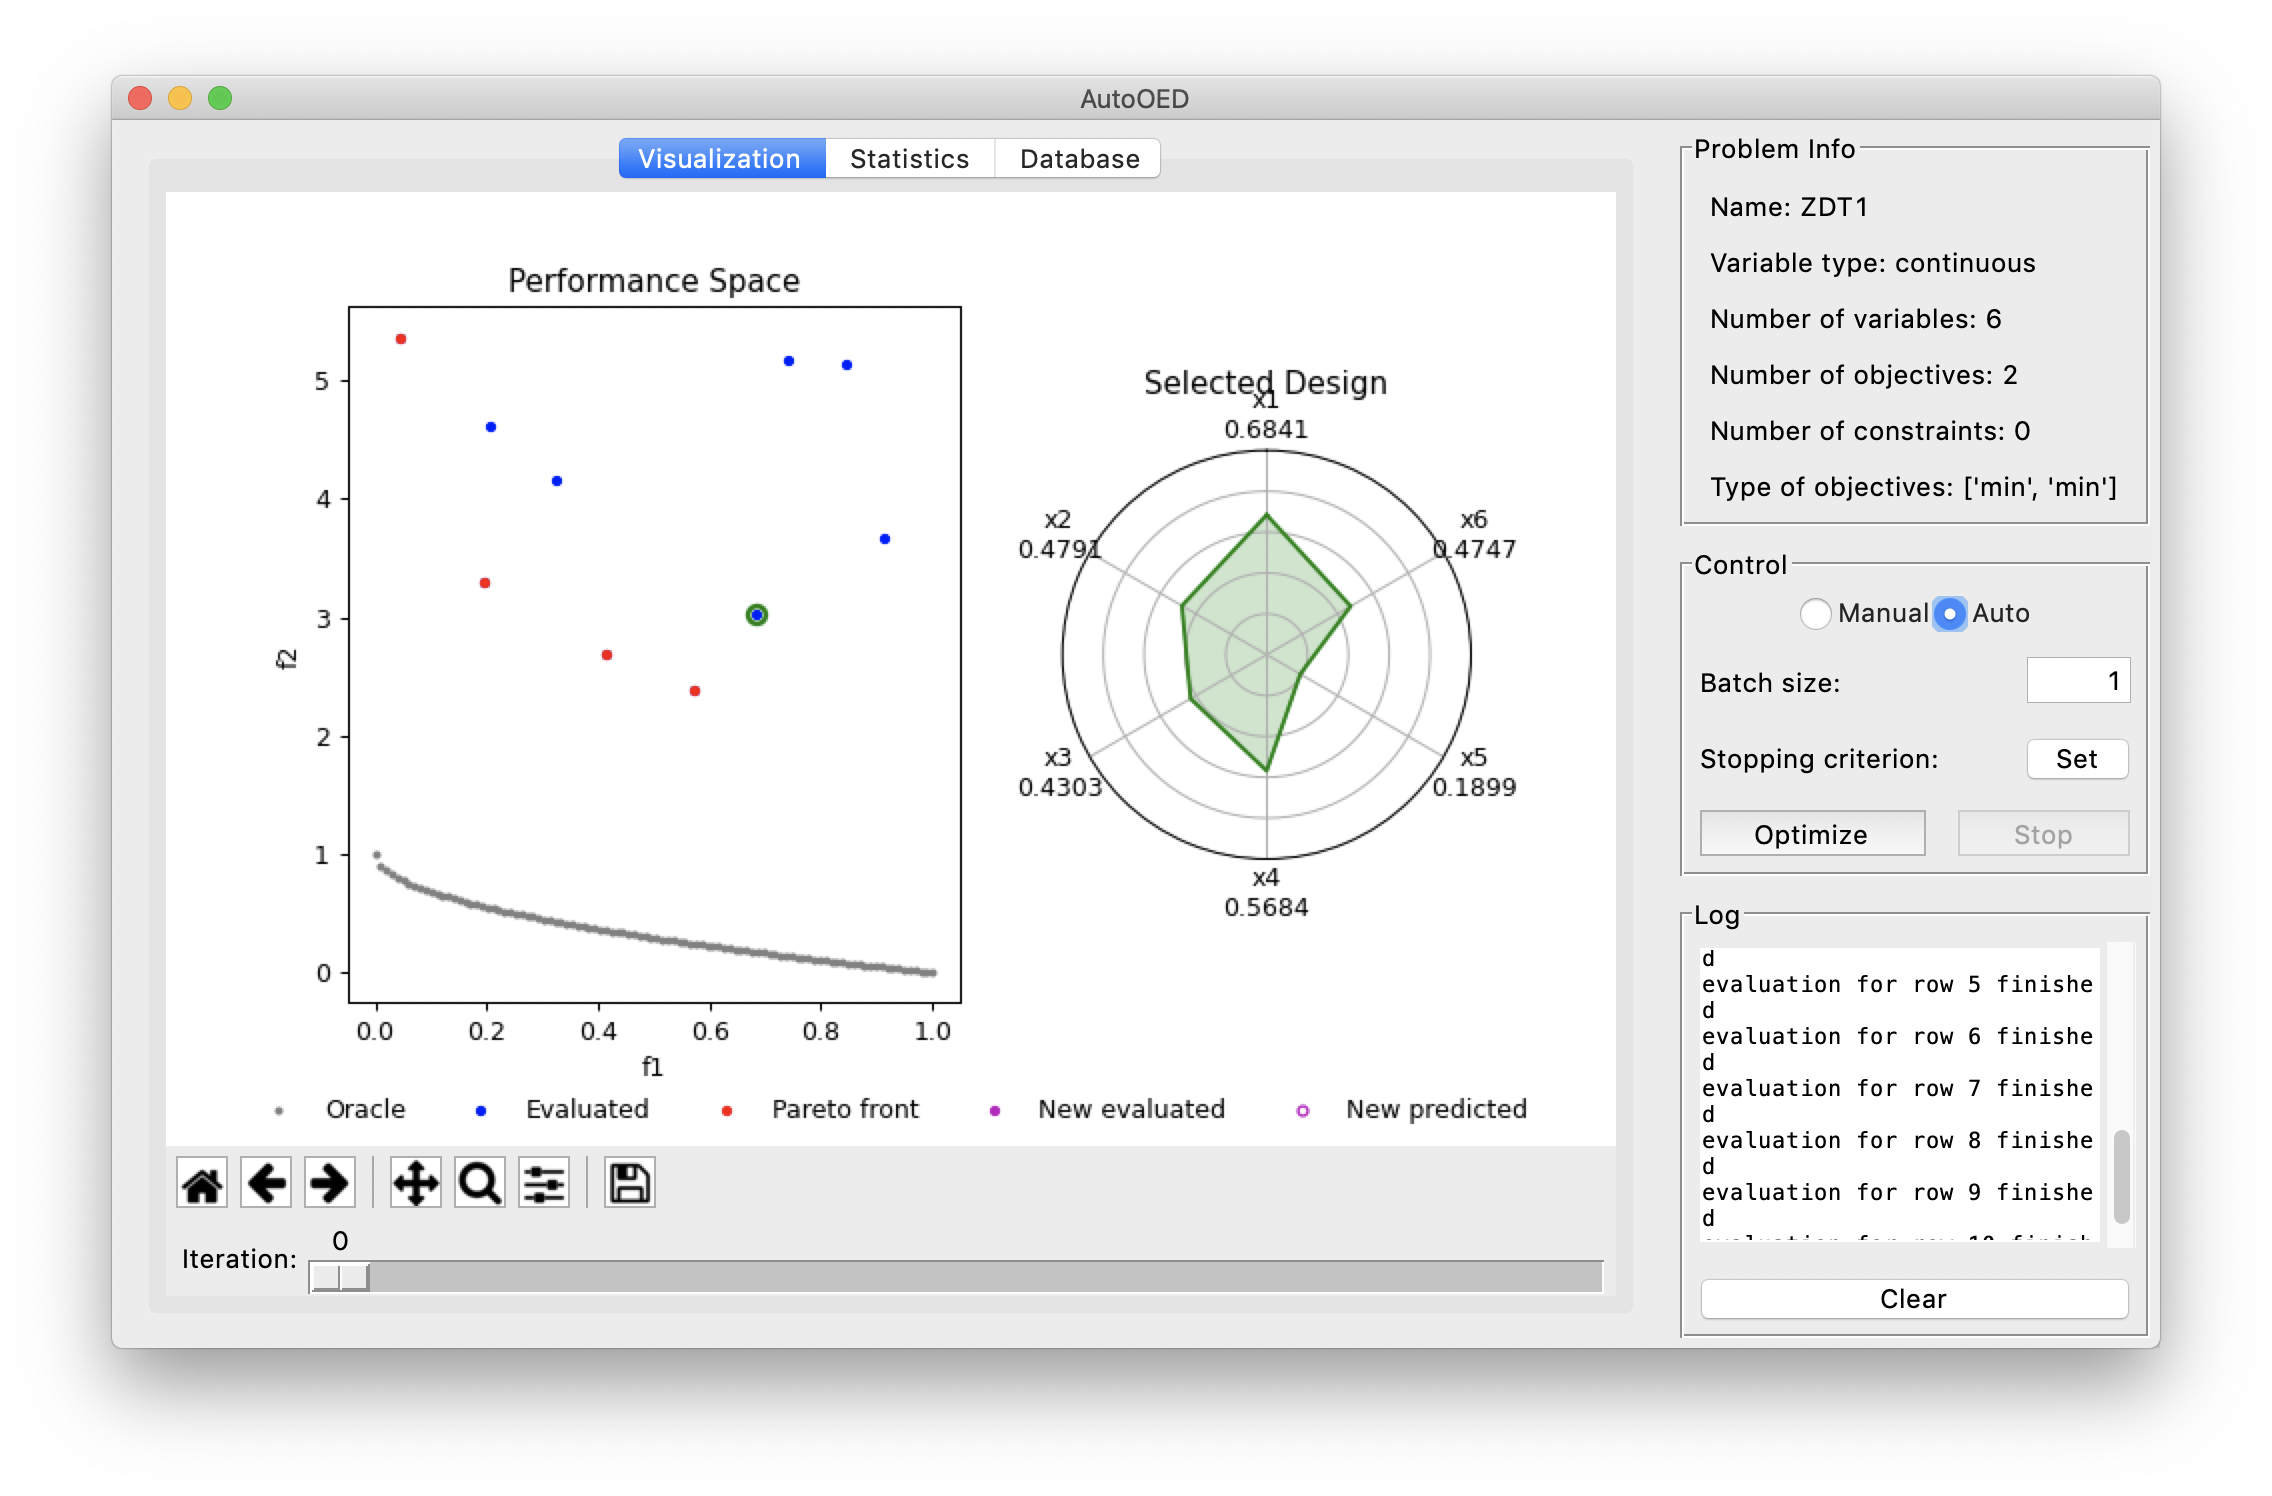
From this window we can see:
- A performance space figure showing the performance of all previously evaluated samples (shown in blue), Pareto front (shown in red), the predicted and the real performance of the latest batch of samples (shown in magenta). And because we are using a predefined test problem, we know the ground truth of the real Pareto front of this problem, which is called oracle (show in grey). But for most of your real problems, the oracle is possibly unknown beforehand, and it will not show in this figure. (Tips: You can click the legends to make certain categories of point visible/invisible).
- A design space figure showing the values of the design variables when you double click a certain point in the performance space. The point you select will be marked in green, which will be unmarked if you do a right click.
- A problem information display showing the basic information of the problem you are optimizing.
- A control panel for starting and stopping the optimization.
- A log display for showing the logs during the optimization.
- A slider at the bottom that controls displaying all the optimization history.
Now you are ready to run the optimization after all the initial samples are evaluated. There are two different modes of the optimization: manual mode and auto mode. Note that if you do not have the performance evaluation program linked to AutoOED, you must choose the manual mode.
Manual Mode
Manual mode runs optimization only for a single iteration.
In each iteration, the user need to first set the proper batch size, then click the Optimize button to start the algorithm, as shown in the figure above.
Then after the algorithm proposes a batch of samples to evaluate, if the performance evaluation program is provided, AutoOED will automatically calls the program
and do the evaluation for these samples. Otherwise, you need to manually evaluate the performance of these samples, and put the evaluated result back to AutoOED.
To do this, you need to click the Database tab at the top to navigate to the Database panel:
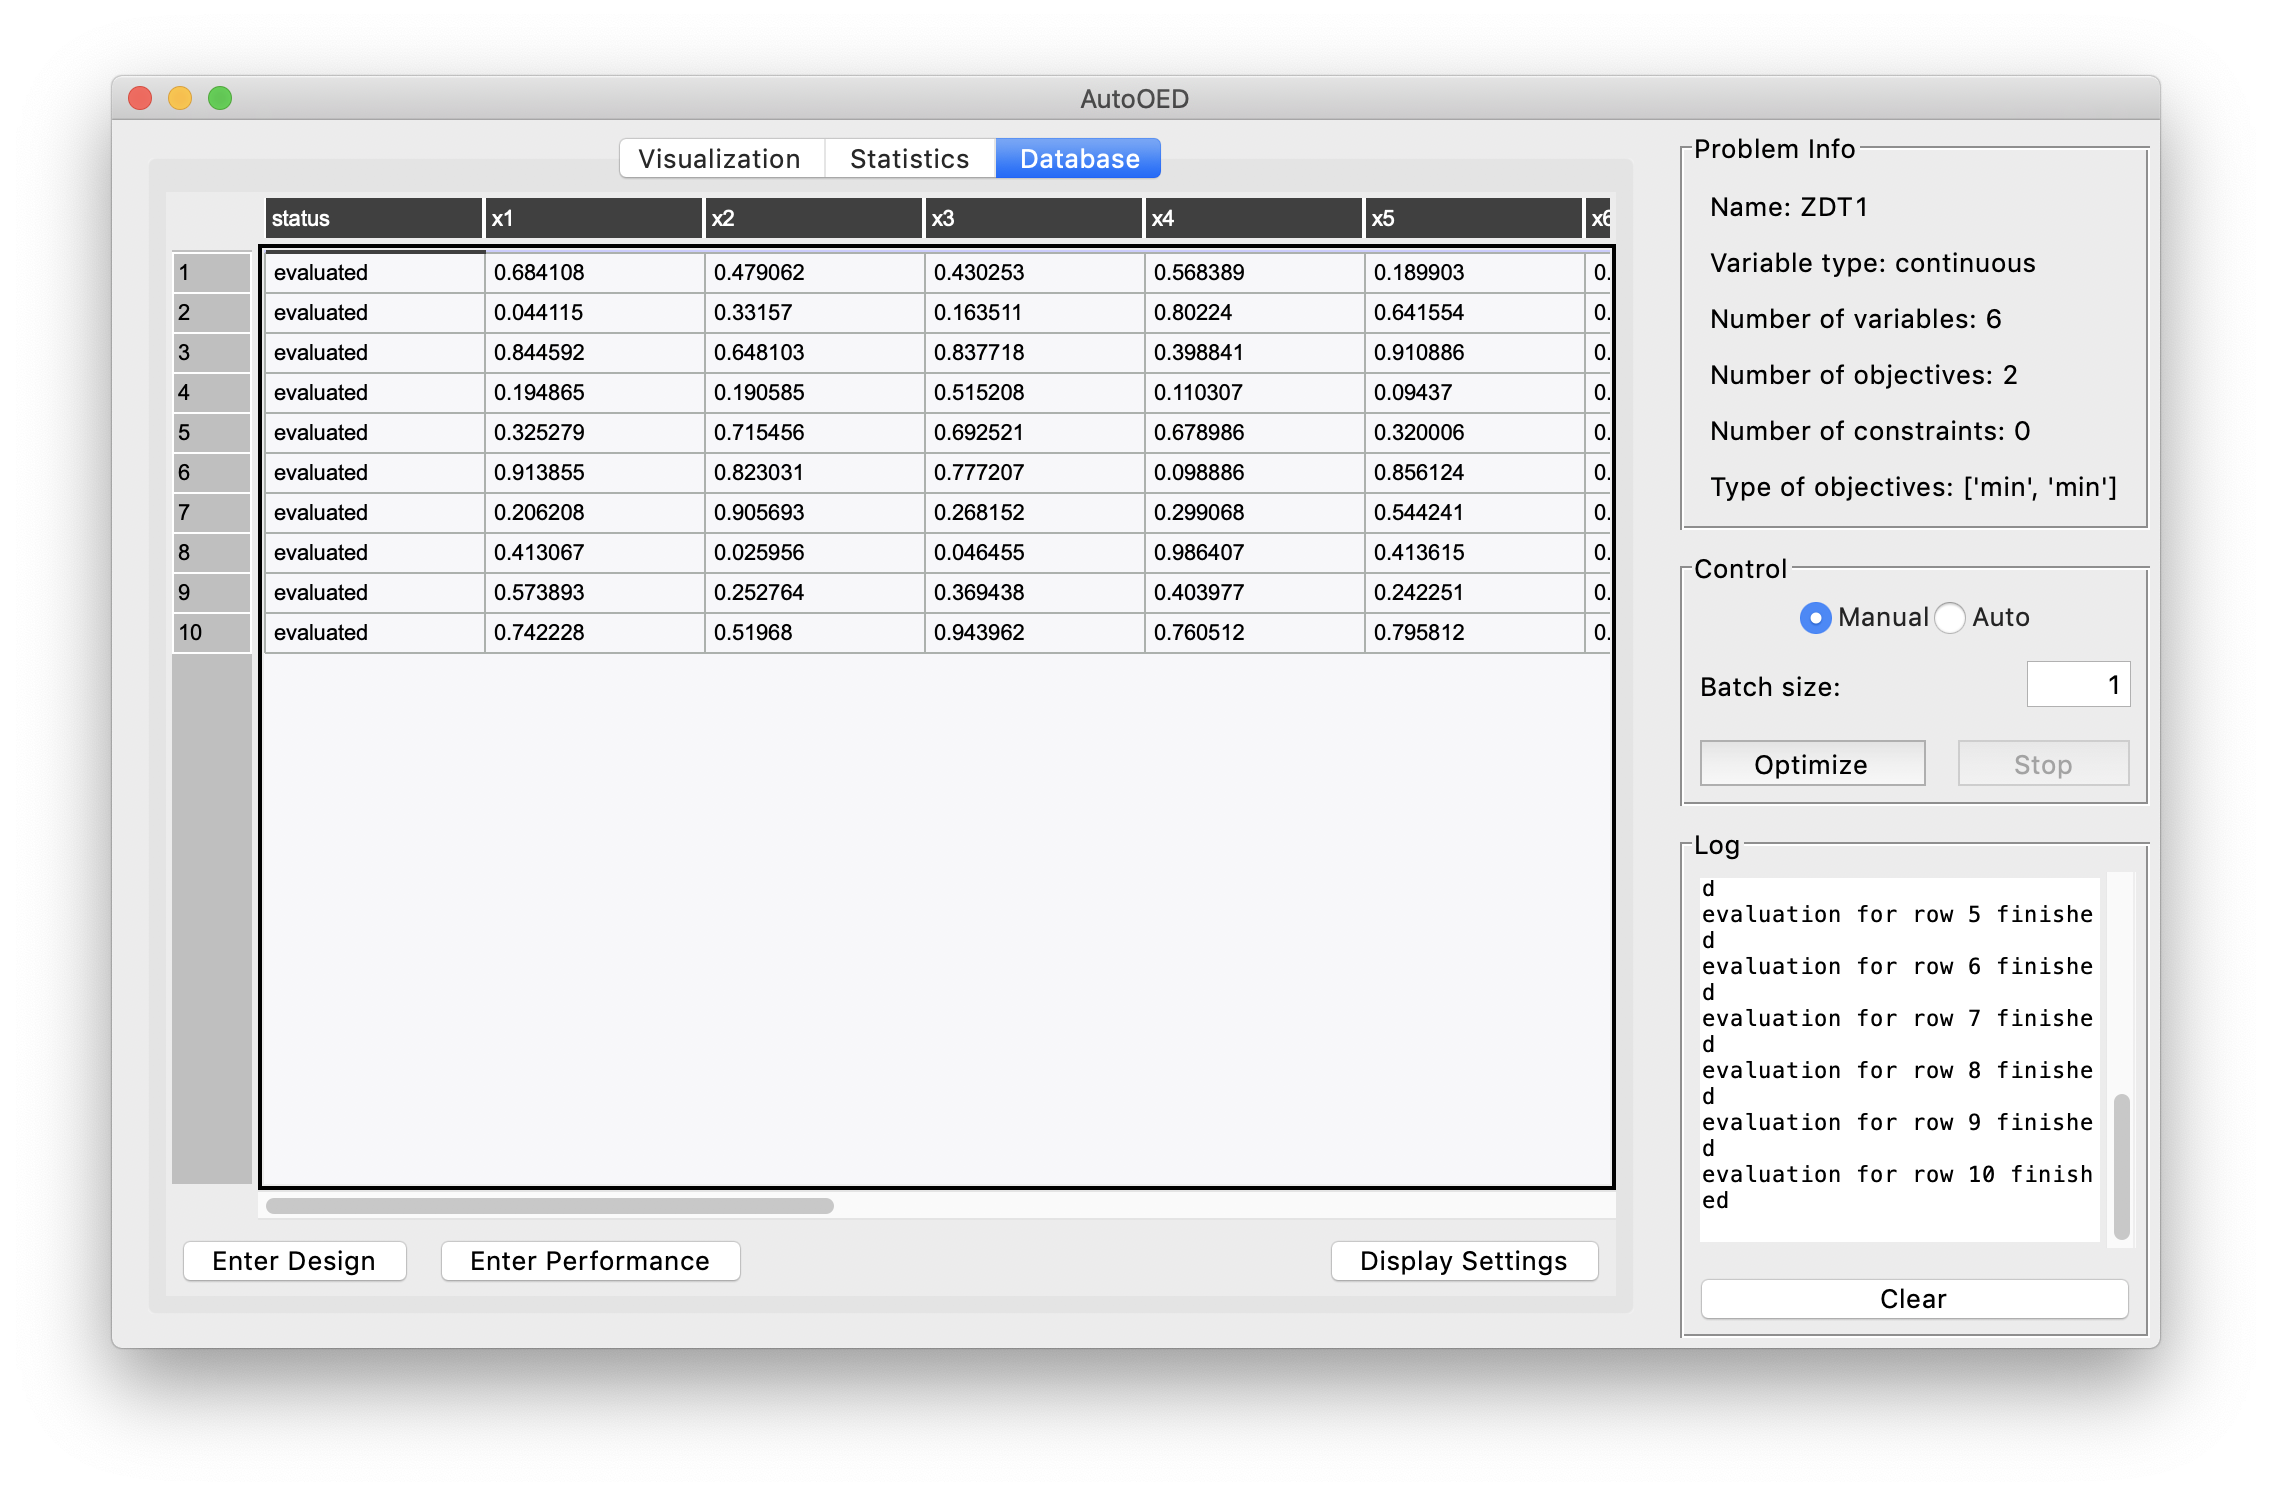
In this panel, you will need to click the Enter Performance button at lower left to manually enter the performance for unevaluated samples,
whose status will appear as “unevaluated” in the database table. After you click that button, this window will show:
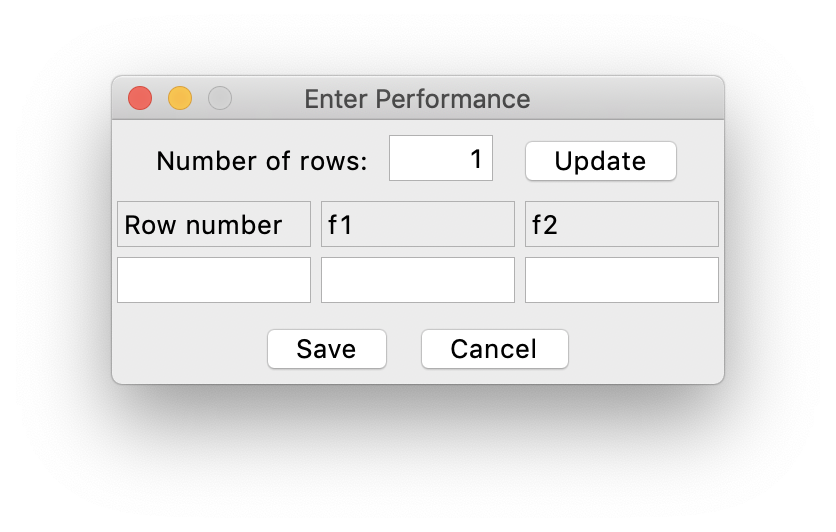
First, you need to specify how many samples you are entering performance for at the top entry, then click Update to update the below Excel-like table
with the corresponding number of rows. Then, you need to input the row number of the samples (by looking at the database table) and their performance values.
Finally, click Save to save the performance values you have entered into the database, and you will see the performance gets updated in the database table.
Auto Mode
Auto mode could run optimization for multiple iterations, and is recommended when user have the performance evalaution program linked to AutoOED.
To switch to auto mode, simply select Auto in the control panel like this:
First, the user need to set the proper batch size and the stopping criterion for optimization.
For setting the stopping criterion, click the Set button and this window will show:
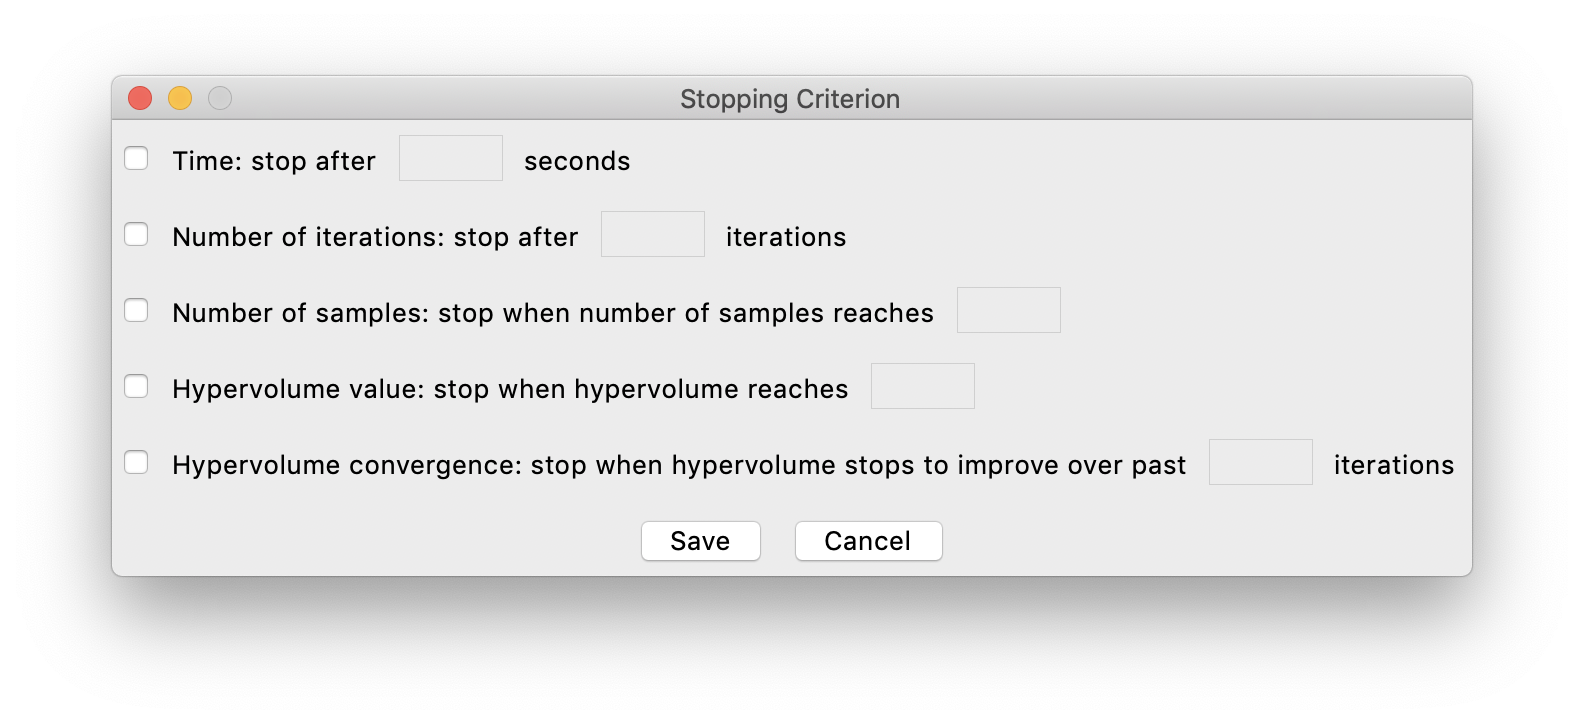
As shown in the figure above, the stopping criterion could be one or multiple of the following:
- A maximum amount of time
- A maximum number of iterations
- A maximum number of samples evaluated
- A maximum value of hypervolume
- A maximum number of iterations that hypervolume stops to improve
To set the criteria, simply click the checkbox(es) to activate and input the corresponding value for your criteria.
Then click Save to save the stopping criteria and return to the main window.
Finally, you can click the Optimize button to start the automatic iterative optimization and evaluation, which stops until one of the stopping criteria satisfies.
Interrupt
Under either mode, at any time, the user can safely stop the optimization by just clicking the Stop button next to the Optimize button.